Monday, October 6, 2014

Tower Garden Week 5 and Week 6

Week 5

Week 6
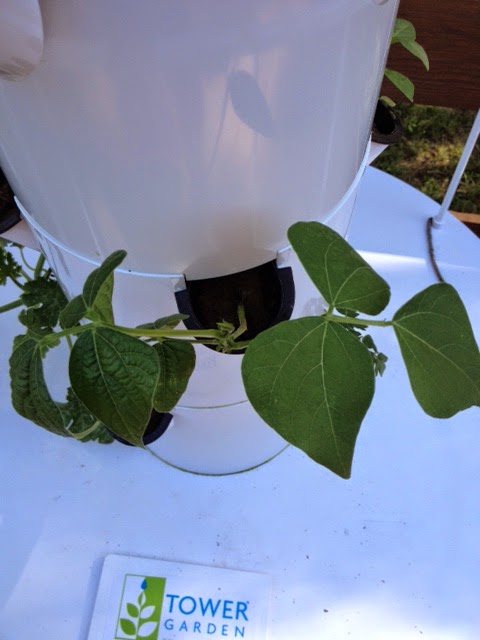
NO REGRETS!!! The Tower Garden is absolutely one of the best investments I have ever made. As a bonus, I can take my garden with me if I ever move!! I am so thrilled with how well it has produced. Even though I started late in August, I have had quite an abundance of produce. I have had salads available every night and I even had some zuchinni and green beans.

Zucchini


Green Beans
    The dip down into the cold temperatures may have slowed down production on some of the flowering plants. I haven't seen any blooms on the tomato plants but I knew they are heat loving producers. The lettuce hasn't been phased by the cooler temperatures. Hoping to get a couple more weeks of warmth so I can harvest my Zucchini and beans before I bring the tower in for the winter next weekend. You never know what you are going to get in October and last Friday night we came really close to having Frost on the Pumpkin. So crossing my fingers... The Zucchini is not quite ready to pick so another week or two before another frosty night would be helpful.

    If you are interested in starting an indoor winter garden, check out my website at http://kbrixey.towergarden.com

You can contact me via email   r4c.ranch  at yahoo.com, if you have more questions or are ready to jump into indoor winter gardening!!!

Saturday, September 20, 2014

The Broody Hen Dilemna

 
     This little gal really wants to hatch out babies. She is stealing all the other hen's eggs and laying on them. She doesn't want to come out of the nesting box even to eat or drink. Today I picked her up and made her come out but she wouldn't go out in the yard with the rest of the flock. She just laid down. I am pretty sure I heard her grumbling, "I don't want to go outside!"
     This is a classic broody hen. I have been reading a lot of blogs and forums about this type of behavior. Some feel you should just give her some eggs and let her hatch them out, others feel you should remove her from the flock and make sure she doesn't have access to any eggs. It's too late in the season for plan A, because it is almost winter and I am not going to try to make sure young chicks survive in the brutally cold winter we are suppose to get. Plan B, my guess, would fail as well since I have seen this hen trying to hatch out gravel on our driveway.
    For now, the plan is to try to make sure she is eating and drinking and to sneak all her eggs before she gets too used to them. In the spring, we will probably separate her and let her hatch out some chicks.

Thursday, September 18, 2014

Week Four: Tower Garden


Week Four -- Wow!
    It's week four and I am absolutely amazed at how great the Tower Garden is producing and for what little effort I have had to put forth. Wow! Check out my red leaf lettuce... it came back after we picked it off for our first salad. And look closely at our vining plant--- we have a blossom! I really thought it was too late in the season to expect them to blossom. It's either zucchini or watermelon. Can't wait to find out which one!
Our blossoming watermelon!
    This week's chores: We do have a little work to do this week. The water needs to be filled and we will be checking the ph and adding nutrients in proportion to the amount of water we added. In addition, we will be trimming back some of the roots that are forming in the reservoir tank. The only ones we have to worry about are the ones growing near the water pump. So we'll carefully trim those back just before we fill the tank.
    This weekend we will be enjoying lots of fresh salad and greens. I have new recipe for sauteed greens that I can't wait to try with my fresh Tower Garden greens. Simply heat up some grapeseed oil in a skillet, add in your greens, sprinkle with balsamic vinegar, fresh ground garlic, salt, and pepper, and stir in the skillet until the greens are wilted and covered with the oil and vinegar mix. Then serve. It's so yummy.

   WEEK FOUR CHORES:

  1. Trim back roots from around the water pump. 
  2. Add water to fill reservoir to 3 inches from top. 
  3. Check Ph and add ph up/down as needed. 
  4. Add nutrient solution in proportions to water added to reservoir. 
   For more information check out:  http://kbrixey.towergarden.com
   Questions?  email me at  r4c.ranch@yahoo.com 


Saturday, September 13, 2014

Our First Harvest from the Tower Garden!


Harvesting the Salad Pods
    It might have been a little early to start picking leaves off the salad pods but as the outdoor growing season is coming to an end, we decided to indulge. The weather has really cooled off, holding in the lower 60's to upper 50's, and it is still unclear whether it will warm back up before it plummets down to the first freeze. Since the weather is staying pretty cool, the timer has been reset to 15 minutes on and 30 minutes off.
    The lettuce seems to love the cooler temperatures but the fruiting plants have slowed down a bit. Tomato plants love the heat so it is still too close to call if they will be fruitful before the freeze or not.  If you have been following the blog, you already know we got a late start on our tower garden. Although we had it assembled in mid July, we had a few trips planned in July and August that set us back several weeks and so here it is mid September and we are only three weeks in.
Fresh Picked Salads
    The good news is we went from seedling to plate in three weeks and that,  I have to say, is very exciting. We pulled two salad plates off the Tower Garden with a mix of red leaf lettuce and the spring mix greens that we had in two of the pods. It will be interesting to see how they grow back especially this late in the season. Our dinner salads, above, were made to order. I like mine with rinsed three bean salad and my son likes his plain with a drizzle of Italian Dressing. They were both delicious. It's hard to beat that picked to plate freshness!

http://kbrixey.towergarden.com

Thursday, September 11, 2014

Week Three: Watching Tower Garden Grow


Week Three Tower Garden
      I get to make a salad today! It is amazing how much the Tower Garden has grown in just three short weeks. I think I have already said this but "This is the easiest garden I have ever had."
      The only chores this week, other than watching the garden grow, is checking the water. Today, I  opened the fill plate  to check the water level and it was fine. I also took a small sample of the water out and checked the PH, which was still holding somewhere between 6.0 and 6.5.
     The weather has turned cooler this week so if it stays cooler, I will be changing the settings on the water pump timer to only run once every thirty minutes instead of every fifteen minutes. That is as simple as moving a few slide settings on the timer that the tower garden is plugged into.


PH about 6.3

  Tower Garden Chores

  1. Listen for the water pump to make sure the pods are getting moisture (daily)
  2. Check the Water Level once a week (twice a week if really hot outside)
  3. Check PH once a week  (add PH Up or Down, if necessary)
  4. Top off the water level when necessary (Add nutrients whenever you add water)
   "This is what the kingdom of God is like. A man scatters seed on the ground. Night and day, whether he sleeps or gets up, the seed sprouts and grows, though he does not know how." Mark 4:26-27 


   Garden Chores You Won't Be Doing

  1. Tilling the soil
  2. Weeding
  3. Watering
  4. Checking for soil borne diseases and pests
  5. Spraying your plants with ---cides: insecticides, pesticides, herbicides, etc. 
      While most backyard gardens are nearing the end of their growing season, it's almost time to move our Tower Garden indoors for the winter. Now is a great time to get  your Tower Garden setup and get your indoor Winter Garden growing. You can successfully grow lettuce, spinach, kale, broccoli, and cauliflower indoors under grow lights in your tower garden.
     If you have been watching my Tower Garden grow and would like to find out more about how you can get into Tower Gardening yourself, please check out my website at http://kbrixey.towergarden.com
   I'll be blogging more about the winter garden in a few weeks. So keep reading and let me know if you have any questions, I would love to share with you all the great things I am learning about the Tower Garden.
 

   Grow Your Own Vegetables, Fruits, Herbs, and Flowers!!!!


Monday, September 8, 2014

Another Homemade Nut Buttermilk Complete Shake Recipe

Dutch Chocolate and Banana
with homemade Peanut Buttermilk
I love, love, love the fresh taste of homemade nut butter. Here is my new recipe for this wonderful, power packed nutritious and yummy breakfast or evening snack!

Dutch Chocolate Banana with Homemade Peanut Buttermilk

Peanut Buttermilk:
1/4 cup of fresh peanuts (shelled)
1/2 tblspoon of olive oil
1 cup of drinking water

Smoothie:
1 cup of Peanut Buttermilk
1 scoop of JP Dutch Chocolate Complete Shake Mix
1/2 banana (frozen)

Use the nut chopper attachment to dust the peanuts in the Magic Bullet (I use the small cup to mix my nut butters in as I use them-- it's the freshest!) Then add olive oil and blend. Add enough of the water to rinse out the small cup and pour it into your shake magic bullet cup.

Pour the rest of the cup of water into the cup with the nut butter. Add one scoop of Dutch Chocolate Complete Shake Mix and 1/2 a banana. Put on the Magic Bullet and blend. Remove the blade, screw on a color coded ring or pour out into your favorite glass and Enjoy a Yummy treat!!

Click here to learn more about JP Complete Protein Mix 

Saturday, September 6, 2014

A "Complete" Breakfast

   
Mixed Berry with Cashew Milk
French Vanilla JP Complete
Smoothie
 Did I mention I learned how to make my own nut butter and nut milk? I have been buying Almond milk at the store. I seriously thought they somehow squeeze those pour almonds until liquid came out. Now that I know how to make nut milk I won't have to buy or preserve store bought milk again.
    I have a Magic Bullet and two large cans of nuts: peanuts and cashews. My favorite nut butter so far: cashew butter!
    My favorite smoothie to date is the Mixed Berry with Cashew Milk made from scratch in less than 5 minutes!
    Here's how:

  1.     Two handfuls of cashews chopped in the Magic bullet with the nut cruncher. 
  2.     Change blades and add a tablespoon or so of Olive Oil and blend into a fine nut butter. 
  3.     Add a Cup and a half or so of natural spring water or drinking water and blend into a creamy milk. 
  4.     Add one scoop of French Vanilla JP  Complete shake mix, 2 heaping tablespoons of frozen blueberries and 2 heaping tablespoons of frozen raspberries. Blend until it turns a light lavender. *I buy fresh berries and immediately freeze them in ziploc freezer bags. 
  5.      Pour into a glass and enjoy your Complete Breakfast or bedtime snack. 

     This is a smoothie you do not have to try to make yourself enjoy. It's delicious and packed with Complete nutrition. Studies show a Complete shake in the morning will help you maintain satisfaction with your portions and eat healthier throughout your day! And did I mention it's so YUMMY!

   For more information on JP Complete Shake Mix check out my website at
    http://kbrixey.juiceplus.com
 

Thursday, September 4, 2014

Week Two: Watching Tower Garden Grow!


The Tower Garden is amazing! In just two weeks I have blooms on my squash. In one more week, I can start harvesting the lettuce. I am so excited.
   Chores this week: watch it grow! The water and ph levels remain at optimum levels.

Tuesday, September 2, 2014

Tower Garden Gets a Face Lift


Tomato Cage Kits
The first level of assembly


  The Tomato cage kit arrived just as my squash is vining out so the Tower Garden got a facelift.

Snap into the Holes
Wingnuts Base and Top Ring


     The tomato cage assembled with a just a few snaps together, and four wingnuts, two to the base and two to the top wing.


For more information visit:
http://.kbrixey.towergarden.com

A New Look
Ready for the Vine Plants


Thursday, August 28, 2014

Week One: Tower Garden Update

   First of all let me shout out: my seedlings survived the first week!!!!! (all but the one that was damaged in shipment and I planted it anyway just to give it a chance). They looked a little sad the first day, when it got up to 98 degrees. However, within a few days the shock of their shipping seemed to wear off and their adjustment to Tower Living seems to suit them just fine.  So far Tower Gardening is so easy even I can do this.
     My chore list for my Tower Garden this week included: well, no watering, no weeding, no spraying for insects, ... the only chore I had was listening every day or so to make sure the pump was cycling on and off every 15 minutes. As an over achiever, I also watched my plants grow new leaves and touched the rock wool occasionally to make sure it was getting moisture.
   At the end of week one, I did have some official chores to do. Because it's been so hot, I topped off the reservoir with water from my garden hose to 3 inches from the top of the opening under the labeled plate. When you top off the water, you add nutrients part A and part B at the rate of 20ml/gallons of water added. I approximated about 2.5 gallons of water was added so I put in an additional 50ml of each part to the reservoir.
     It's recommended to check your PH once a week, especially when you add water and nutrients. So I dipped  5ml of water out of the reservoir and did a quick PH test. The PH was holding at 6.0! Perfect!
    This is the easiest gardening I have ever under taken. And it looks pretty awesome on my deck, too!!!

   Learn more about the Tower Garden at http://kbrixey.towergarden.com/  

Friday, August 22, 2014

We're up and Running!

     The seedlings arrived on Wednesday from Living Tower Seedlings, They were in pretty good shape except the watermelon vine didn't seem to make it so I snapped a photo of it and emailed it to customer service, They credited my account for my new order. They will also resend your seedling if you request but because we are starting so late in the season I decided to wait. 
     The seedlings come ready to insert into the Tower Garden nestled in their rock wool coat. I removed the stacks that held them in the packs and removed each pod. I carefully placed the pods into the water tray using the same map in which they were labeled when shipped. The pods will soak in the sunshine for 24 hours before I move them to the Tower Thursday evening. 


     I put all the supplies I will need in a tote. The only thing you need is a ph testing kit, ph up and ph down, and nutrient solution.

     I am  happy I ordered the  dolly because after filling the reservoir with water that tower wasn't going to be moving anywhere. The dolly offered by Tower Gardens JP+ fit the Tower Garden to a tee.


     After we filled the reservoir, I tested the pump to make sure it was filling the basket and draining through all the pod baskets.


     The next step was to test the Ph.


   It was a little high so we added some PH Down and retested. Adding a little more until it came exactly 6.0


     Then all that was left was to add the nutrient solution Part A and Part B as directed, hook up the timer and make sure the solution was pumping through the system at a cycle of 15 minutes on and 15 minutes off.


    Then came the funnest part. We got to fill our pod baskets with our seedlings. I used our map to make sure the herbs were on top, then our leafy vegetables, then the bushes, and then on the bottom I placed all our the fruiting vines. 


The finished product: 

DAY ONE!! 

Wednesday, July 9, 2014

Seed Starter

   I followed the directions putting the Tower Garden together with a few exceptions and advice from friends already doing the Tower Garden.
   1) I held off filling the resevoir with water until my seedlings are ready to transfer onto the tower. This was recommended because light will enter through the baskets if they are not filled and cause algae to grow in the water.
   2) Once the resevoir is filled with water I will test and set the water pump for the proper level before mixing the nutrient solution. Then I won't have to wear gloves and won't have to get my hands in the nutrient solution once. After the pump is set I will mix the solution and check and adjust the PH.
                                                        3) I decided to start with seeds in the included seed starter. I took the advice offered by the Tower Garden instructions to avoid introducing any potential diseases from potted store plants into my nutrient solution.
    I made a diagram of my seed layout in the minature seed greenhouse. I labeled what seeds I placed into each rockwool pod so that I can later place the right seedlings at the right level. I plan to put my leafy vegetables near the top and my fruiting vines near the bottom with the larger fruits near the back of the balacony so I can train them to climb on the deck rails. Now we wait for those wonderful green sprouts to appear!

My Tower Garden is Here!

It's Here!!
   My Tower Garden has arrived. I am so excited. I have tried a lot of gardening methods including Four Square Gardening, row gardening, raised beds, and indoor hydroponics. Even tried the Garden boxes, which didn't go so well during the year of the drought. I was most successful at my first raised bed four square garden where I mixed my own soil and used garden paths in between each 4x4 bed.
     My indoor hydroponics garden would have been successful if I had only planted greens indoors over the winter. I had the tallest tomato plants and green pepper plants that reached the ceiling, only they refused to set fruit. Since we have moved to the ranch, my gardens have  produced little fruit and what fruit was produced was eaten by insects or destroyed by disease.
  I had all but given up on gardening until I learned about the Tower Garden. It is similiar to the hydroponics garden except it adds vertical gardening. This is the only method I decided to try that was actually recommended by friends I know that are using it instead of just internet testimonies on some website. I have gotten a chance to see and try their produce and it is amazing.
      If you get a chance to see the Tower Garden up close, it doesn't take long to be totally amazed by the amount of wonderful produce in a small amount of space. And not only does it conserve space and water but the produce is the best I have ever seen, even fresher than the farmers market. You can literally take your plate to the garden. It doesn't get more fresh picked than that.
    The science is called aeroponics. Click here to see it  being used at The Land at the Epcot center.  http://thephotogardenbee.com/2010/01/05/aeroponics-gardens-at-epcot-part-iii-the-land/
The Tower Garden was designed using the same technology used at the Epcot center.
   You can follow this blog and see step by step how the Tower Garden works for an amateur and relatively unsuccessful garden like myself. Will I be able to grow From Tower to Table as promised? Let's find out!
Unpacking
   So far so good. The box came in three days which was four days earlier than the expected delivery date. Opening the box I found it well organized, carefully packaged, and easy to remove  by myself. I found the written instructions and a DVD. I proceeded to assembly the Tower Garden in less than 15 minutes. No tools required. The best part was the DVD that came with it had assembly instructions which were extremely simple to follow. No reading required!

Instructions


Making sure it's Level
The first thing was to find a level location and set the base out where it can get full sun. Then we added a pump and tube.
     Again I just followed the instructions on the DVD, pausing between steps and following along until the entire Tower Garden was assembled.


Growing sections slide on to rods
I added the rods and then the growing sections to the base. At the top I placed the shower cap on.


Shower Cap


Fully Assembled Tower Garden

The last step was putting in the baskets into each of the 20 growing ports. That is it. So simple. So nice looking on the deck.

   Tomorrow morning we will fill the reservoir and adjust the pump for the proper action. Then we'll mix our solution, check the Ph, and start our seedlings. Follow along and you can see exactly how long it takes to go from Tower to Table!

www.kbrixey.towergarden.com

Friday, June 27, 2014

My Plate

My New French Fries
     Teaching my tummy what our new french fries taste like. That's right I passed up the fast food on way home from shopping tonight. I have this bad habit of eating all the fries while they're hot on the way home. I intentionally grabbed some grapes to substitute for that habit on the way home. Had to be something ready, something sweet, something wonderful to work.
     My son and I both munched on a handful grapes on the trip home from the grocery store. I bought a variety of fruits and vegetables, while avoiding anything with a label. Healthy eating choices start with what you put in your basket and allow in your kitchen. Since I was adamant we were cutting back on sugar and filling our kitchen with wholeness, I let him select his favorite fruits and vegetables to fill up half his plate with while I planned to cook smaller portions of the main dishes we have always loved.
    Get used to it tummy-- the rainbow of Fruits and Vegetables has just replaced your same old colored, white, potatoes cooked in a way that not only increases the caloric intake but destroys much of the beneficial properties. The kitchen is now well stocked with plenty of fresh, whole choices to satisfy any sweet tooth without compromising our overall health.

Say 'Hello' to My Plate:
   The new USDA recommendations for serving proportions on a healthy plate replaces the complicated Food Pyramid and is closer to what I grew up on: the four squares. I love this simple plate design. It's easy to visual, easy to understand, and easy to use.
 
How to use My Plate:
     The first thing to do is make sure you put a lot of healthy fruits and vegetables in your shopping cart. Better yet, head out to your farmer's market this Saturday. Choose fresh, raw fruits and vegetables in a wide rainbow of colors: red, orange, yellow, green, greenish/white, and blue/indigo/violet. It doesn't matter whether you choose a fruit or vegetable in any of the color groups but remember fruits have more sucrose or natural sugar, than most vegetables. Plan your meals around a small portion of lean proteins and whole grains. You can always add dairy by sprinkling with cheese or cooking with a touch of sour cream.
   
My Dinner Plate
    When it's time to fill your plate; start by covering half to three quarters of your plate with fruits and vegetables. Then add your portion of lean proteins and whole grains. Think about your plate when you eat out as well. Instead of getting a salad plate and a buffet plate, how about just getting one plate and filling up one half of your plate with a salad before you head to the buffet line to fill up the other half.
    My dinner plate is an example of carry out food from our local Chinese restaurant. Of course they don't serve salads but before we opened the paper cartons of fried rice and General TSO's Chicken, we covered half our plate with vegetables we had on hand. Then we scooped out a portion of the fried rice and a portion of the General TSO's chicken, and immediately put the rest back in the refrigerator. The next afternoon we had a wonderful lunch to look forward to.
     My Plate is a wonderful way to make sure you are getting more fruits and vegetables in your diet. Remember, adding a wide variety of fruits and vegetables from the color spectrum helps you get the most benefit from the food you eat. The phytochemicals unique to each color offer a variety of defenses and repairs to your body. In addition, they are low in fat, calories, and sodium, high in fiber (which fills you up and helps with the digestive process), they are packed with vitamins and minerals that provide energy, and are cholesterol free.